Luxury Vinyl Plank (LVP) flooring has become increasingly popular in recent years due to its durability, aesthetic appeal, and ease of installation. It replicates the look of hardwood or stone but at a fraction of the cost, making it an attractive choice for homeowners. LVP is designed to withstand heavy foot traffic, resist stains, and provide a comfortable walking surface. Its water-resistant properties also make it suitable for areas like kitchens and bathrooms.
Common Problems Found in Subfloors
When considering LVP for your home, it’s essential to understand its composition. LVP is typically made from several layers, including a wear layer that protects against scratches and dents, a printed design layer that mimics the appearance of natural materials, and a core layer that provides stability. Some premium LVP options, including
top-rated luxury vinyl plank flooring, also include an underlayment for added cushioning and sound absorption. This composition not only enhances the floor’s longevity but also contributes to its realistic look and feel.
Before you can install luxury vinyl plank flooring, you must address any issues with your subfloor. Common problems that can affect the installation include uneven surfaces, moisture presence, and structural weaknesses. Without proper attention, these issues can lead to floor damage, reduced lifespan, and an unsatisfactory finish.
Uneven subfloors are a frequent challenge, often caused by settling foundations, wear and tear, or previous installations. Such irregularities can create gaps, bumps, or slopes that compromise the LVP’s performance. It’s crucial to identify these areas and take corrective measures, such as sanding down high spots or filling low areas with levelling compounds, to achieve a flat surface.
Moisture in the subfloor can also pose significant risks to LVP flooring. Whether from leaks, high humidity, or ground seepage, moisture can lead to warping, mould growth, and adhesive failure. Conducting thorough moisture tests and implementing necessary preventive measures, like installing a vapour barrier, is vital to ensuring the longevity and integrity of your new flooring.
Tools and Materials You’ll Need for Prep Work
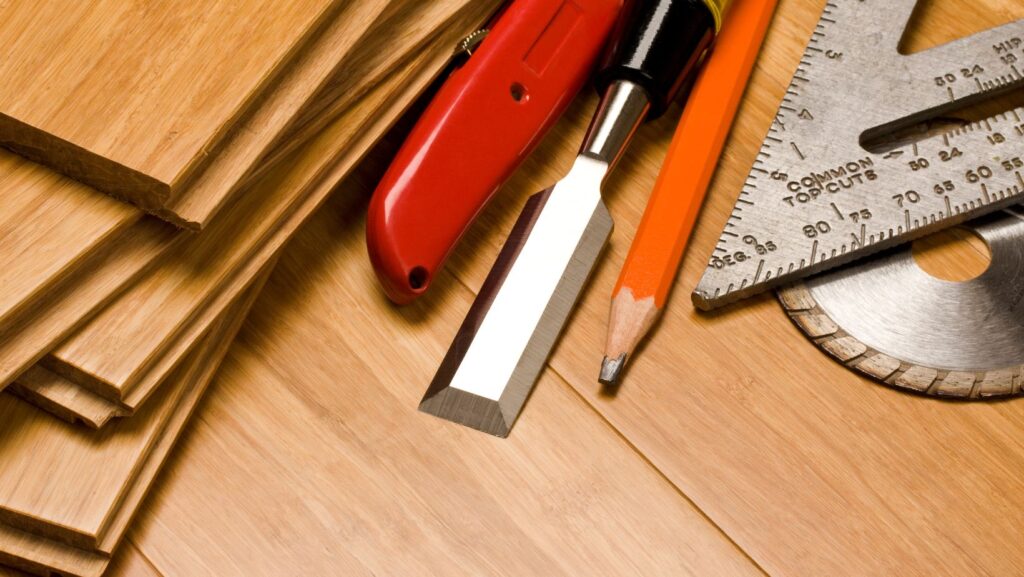
Preparing your subfloor for LVP installation requires specific tools and materials to ensure a smooth process. Having everything ready beforehand will not only save you time but also help you achieve a professional finish. Here’s a list of essentials you should gather:
Tools:
- Tape Measure
- Level
- Utility Knife
- Pry Bar
- Hammer
- Floor Scraper
- Circular Saw
- Sanding Block
- Moisture Meter
Materials:
- Levelling Compound
- Patch and Repair Kit
- Vapour Barrier
- Adhesive Remover
- Cleaning Supplies
Each tool and material serves a specific purpose during subfloor preparation. A level is crucial for checking flatness, while a moisture meter helps identify damp areas that need attention. The use of a floor scraper and adhesive remover is essential for eliminating residues from previous installations. Ensuring your workspace is clean and free from debris is equally important for effective preparation.
How to Remove Old Flooring the Right Way
Removing old flooring is a critical step in preparing your subfloor for luxury vinyl plank installation. The process can vary depending on the type of existing flooring, such as carpet, tile, or hardwood. Each type requires a different approach to ensure the subfloor is adequately prepared and free from remnants that could interfere with the new flooring.
For carpeted floors, start by removing the carpet and padding. Use a utility knife to cut the carpet into manageable strips, then pull it up using a pry bar. Be sure to remove all staples and tack strips carefully to avoid damaging the subfloor. For tile floors, a floor scraper or chisel can help remove the tiles and mortar. It’s important to clear all adhesive residues to create a clean surface for the LVP.
If you’re dealing with hardwood floors, the removal process can be more challenging. Use a circular saw to cut the boards into sections, then pry them up with a pry bar. Take care to remove any nails and staples left behind. Once the old flooring is removed, inspect the subfloor for any damage and make necessary repairs before proceeding. This meticulous approach ensures your LVP installation will be smooth and long-lasting.
Moisture Testing and Prevention Methods
Moisture is a significant concern when installing luxury vinyl plank flooring, as excessive moisture can lead to warping and damage over time. Conducting moisture tests on your subfloor is a crucial step in the preparation process. A moisture meter is an effective tool for this task, providing precise readings that help you determine whether your subfloor is within acceptable moisture levels.
When testing for moisture, take readings at various points across the subfloor to get an accurate assessment. If the readings indicate high moisture levels, you’ll need to address the issue before proceeding with installation. Possible solutions include improving ventilation, using a dehumidifier, or installing a vapour barrier to prevent moisture from affecting the LVP.
Prevention methods are equally important for maintaining the integrity of your flooring. Ensuring proper sealing of windows and doors can help reduce humidity levels within the space. Additionally, installing a quality underlayment with moisture-resistant properties can provide added protection. By taking these precautions, you can prevent potential problems and ensure a successful LVP installation.
Levelling and Strengthening the Subfloor
A level and strong subfloor is essential for a successful luxury vinyl plank installation. Uneven surfaces can cause planks to shift or create unsightly gaps, while a weak subfloor can lead to structural issues over time. Addressing these concerns through levelling and strengthening techniques is crucial to achieving a professional finish.
Start by assessing the flatness of your subfloor using a level. Identify any high or low spots that need attention. For minor unevenness, sanding high areas and using a levelling compound on low spots can create a smooth surface. For more significant issues, you may need to install additional subfloor panels or use a self-levelling compound to achieve the desired flatness.
Self-levelling concrete (often used as underlayment) is designed to create a flat and smooth surface with sufficient strength for interior flooring, including vinyl.
Strengthening the subfloor is equally important, especially in older homes where the existing subfloor may have weakened over time. Reinforce weak areas by adding new plywood sheets or using construction adhesive to secure existing panels. Ensuring your subfloor is both level and strong will provide a solid foundation for your LVP flooring, reducing the risk of future problems and enhancing the overall durability of the installation.
 Preparing for a Smooth LVP Installation
Once your subfloor is properly prepared, you’re ready to move on to the final steps before installing your luxury vinyl plank flooring. Ensuring a clean and organized workspace is crucial, as any debris or dust can affect the adhesion of the planks. Sweep and vacuum the area thoroughly to remove any particles that could interfere with the installation process.
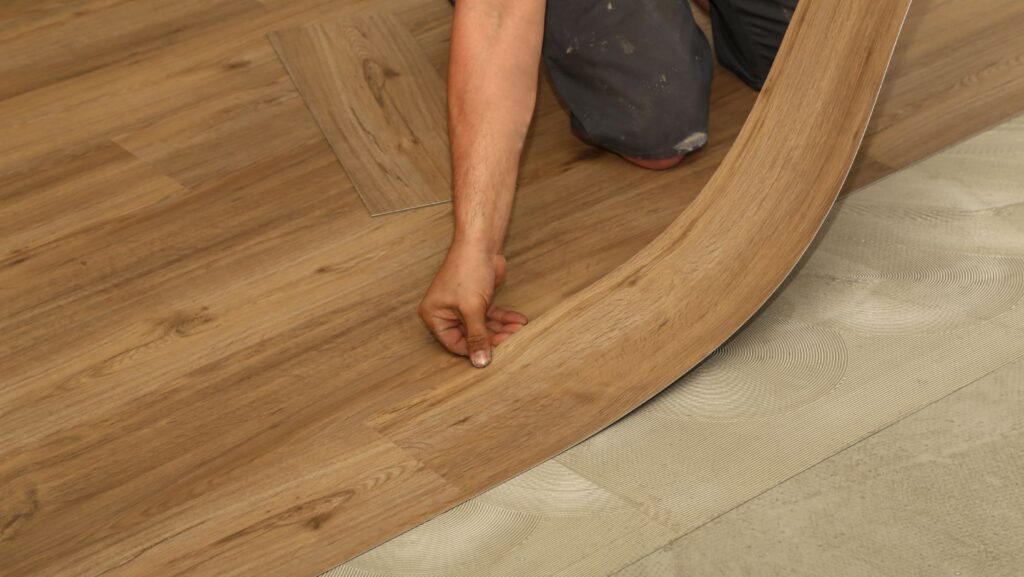
Next, lay out the LVP planks in the room to get a sense of how they’ll fit and look. This dry run allows you to make necessary adjustments and ensure a seamless appearance. Pay attention to the direction of the planks, the pattern, and any design features you want to highlight. Making these decisions upfront will save you time and effort during the actual installation.
Finally, gather your installation tools, including a tapping block, rubber mallet, and spacers, to ensure a precise fit. Follow the manufacturer’s guidelines for installation, starting from the longest wall and working your way across the room. Taking these preparatory steps allows you to achieve a beautiful, professional-looking floor that enhances your home’s aesthetic and functionality.
Summary
Preparing your subfloor for luxury vinyl plank installation is a multistep process that requires careful attention to detail. From understanding the benefits and composition of LVP flooring to addressing common subfloor issues, each step is crucial to achieving a successful installation. Levelling and strengthening the subfloor further contribute to a durable and long-lasting floor. Remember, a well-prepared subfloor is the foundation for beautiful, resilient LVP flooring that will enhance your home for years to come.