There’s something deeply satisfying about rolling up your sleeves and tackling a home project yourself – especially one that transforms your kitchen from ordinary to extraordinary.
Installing a butcher block countertop might sound ambitious, but in truth, it’s one of the most rewarding upgrades you can take on as a homeowner. Wood has a way of inviting warmth, texture, and authenticity into a space, and unlike stone or quartz, it’s a material that welcomes your touch.
With the right prep, tools, and a little patience, you can cut, secure, and finish your new countertop with confidence. This guide walks you through every step of the process, from acclimating your new surface to applying that final protective coat. And the best part? Every time you set down a cup of coffee or knead a ball of dough, you’ll know your own hands built the heart of your kitchen.
What You’ll Need Before You Start
Success starts with proper preparation.
Gather these essential tools and materials before you begin:
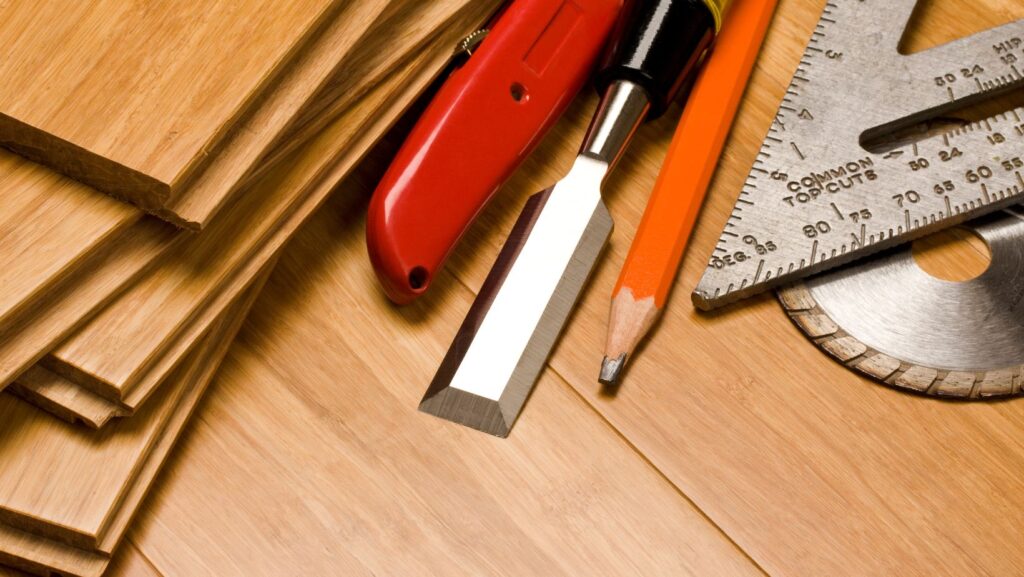
Gather Your Tools
- Tape measure and pencil
- Painter’s tape and straightedge
- Circular saw with fine-tooth blade (or track saw)
- Power drill with wood bits
- Clamps (at least two bar or pipe clamps)
- Orbital sander or sanding block
- Sandpaper in progressive grits: 80, 120, 220
- Vacuum and tack cloth for dust removal
- Level
- Safety gear: eye protection, ear protection, dust mask, work gloves
Materials Required
- Butcher block countertop slab
- Wood screws (1½ to 2 inches)
- Cabinet brackets or L-brackets
- Washers for mounting hardware
- Food-safe finish (mineral oil, tung oil, or specialty wood conditioner)
- Clean, lint-free cloths
Why acclimation matters
Unwrap your butcher block and let it rest indoors for 2-3 days in the room where it will be installed. This lets the wood balance with your home’s temperature and humidity, helping prevent movement that can lead to warping or cracking after install.
Step 1: Measure Twice, Cut Once
Accurate measurements separate professional-looking results from frustrating do-overs. Start by confirming your cabinet depth – most standard base cabinets measure around 24 inches, but always verify before making assumptions.
Mapping your cuts:
- Mark with painter’s tape: Use tape to outline cut lines on your countertop surface. The tape prevents splintering during cuts and gives you a clear visual guide.
- Plan your overhangs: Decide how much overhang you want on the front edge (typically ¾ to 1½ inches) and mark accordingly.
- Support during sawing: When cutting, support both the piece you’re keeping and the off-cut. This prevents the wood from binding, splintering, or dropping suddenly as the blade exits.
For sink and appliance cutouts:
- Measure from two fixed reference points (usually the back wall and a corner).
- Create or use a template from the manufacturer.
- Transfer measurements to the underside of the slab for cleaner layout visibility.
- Cut interior openings first, before final installation.
The critical step everyone forgets: Seal all freshly cut edges immediately after cutting. Exposed end grain absorbs moisture quickly, which can lead to swelling or discoloration. Apply multiple coats of your chosen finish to these areas, letting each coat dry before adding the next. This takes fifteen minutes but prevents months of regret.
Prefer to skip the cutting stage? Butcher Block Co. offers custom-cut countertops made to your exact specifications, along with pre-finished options that arrive ready to install. This eliminates the most nerve-wracking part of the process while still giving you the satisfaction of completing the installation yourself.

Step 2: Dry Fit and Prep for Installation
Before committing to screws, test everything with a dry fit. It’s the best way to catch alignment issues early.
- Set and check: Lay the slab on your base cabinets and ensure it sits flat, even, and flush against the wall.
- Clamp lightly: Use clamps to hold the slab in place as you review overhangs and corner fits.
- Leave expansion gaps: Keep ⅛-¼ inch between the countertop and walls or other fixed surfaces. This small space allows the wood to move naturally with humidity changes.
- Mark pilot holes: Note where screws will go – usually through cabinet brackets or support rails – to ensure solid anchoring points.
Step 3: Secure the Countertop (Without Restricting Movement)
Here’s where many well-intentioned DIYers go wrong – a simple oversight that can cause long-term damage.
The instinct is to screw everything down tight or even glue the countertop for maximum stability. Don’t. Wood moves, and if you prevent that natural movement, it will crack under stress – a costly nightmare. Follow this fastening approach to ensure strength without rigidity:
- Fasten from underneath: Attach through cabinet brackets or corner blocks from below the countertop surface.
- Drill oversized holes: Make mounting holes in your brackets about ⅛ inch larger than your screw shaft. This allows the wood to shift microscopically as humidity changes throughout the year.
- Use washers wisely: Place a washer under each screw head to prevent pull-through, but don’t over-tighten. The countertop should feel stable yet have just enough play to accommodate natural movement.
- Skip all adhesives: Never use construction glue or adhesive to bond butcher blocks to cabinets. While it seems like added security, it eliminates the flexibility that keeps your countertop intact long-term.
Space fasteners every 18 to 24 inches along the length of your countertop. Use fasteners designed for wood countertops that allow slight lateral movement as humidity changes.
Step 4: Sand, Seal, and Finish the Surface
A refined finish starts with smart prep and patient application.
- Sand progressively: Work with the grain through 80 > 120 > 220 grits, ensuring the surface is uniformly smooth.
- Remove dust completely: Vacuum and wipe with a tack cloth before finishing.
- Applying your finish: Choose food-safe options if you’ll prep food directly on the surface. Mineral oil, tung oil, or specialty wood conditioners work beautifully. Leading brands such as Butcher Block Co. offer formulated conditioners that combine oil and beeswax for enhanced protection and subtle sheen.
- First application: Pour a generous amount onto the surface and work it into the wood with a clean cloth, moving with the grain. Let it soak for 15 to 20 minutes, then wipe away excess that hasn’t been absorbed.
- Initial saturation schedule: Apply oil daily for the first week, every other day for the second week, then weekly for the first month.
- Ongoing maintenance: Once fully conditioned, monthly applications keep the surface protected and beautiful. The wood will tell you when it needs oil – look for dull spots or areas that feel dry to the touch.
If you prefer low-maintenance durability and won’t cut directly on the surface, consider a Conversion Varnish or Urethane finish. These create a hard, water-resistant coating ideal for areas near sinks. However, they prevent cutting directly on the countertop since knife marks damage the protective layer.
Step 5: Final Touches and Long-Term Care
Before celebrating your completed installation, take a moment for these finishing details:
- Final alignment check: Walk around and sight along edges and seams. Make any micro-adjustments at the mounting brackets if needed.
- Clean excess finish: Wipe away any pooled oil or residue from corners and edges.
- Allow proper cure time: Give your finish at least 24 to 48 hours to set fully before placing heavy appliances or starting daily use.
Once installed, protect your investment with mindful daily habits that keep your countertop looking beautiful for years to come.
Set hot pots and pans on trivets rather than directly on the wood – even the most durable finishes can scorch under direct heat. Use cutting boards when prepping meals to minimize surface wear and extend time between refinishing. Acidic liquids like lemon juice or wine can leave dark stains if they sit too long on the wood. So, when spills happen (and they will), wipe them up right away.
Common Mistakes to Avoid
Even experienced DIYers can stumble on a few key points:
Skipping acclimation time: Installing immediately after delivery invites warping and cracking within weeks. Those 2-3 days of patience prevent months of regret.
Forgetting to seal cut edges: Exposed end grain is incredibly porous and vulnerable to moisture – a common cause of premature damage in DIY installations. Apply multiple finish coats to any area you’ve cut, even if it will be hidden.
Over-tightening mounting screws: When screws bite into wood, the impulse is to give one more turn for good measure. Resist. Butcher blocks secured too rigidly can’t accommodate natural expansion and contraction, leading to stress cracks that spider across the surface.
Using the wrong finish: Not all wood finishes are food-safe. Regular polyurethane may contain chemicals unsuitable for food-contact surfaces. Always choose finishes explicitly labeled as food-safe if you’ll prep meals on the wood.
Neglecting regular maintenance: Monthly oil applications take five minutes but prevent microscopic cracks where moisture and bacteria hide. Consistent care keeps your countertop looking beautiful for decades.
Final Thoughts: The Reward of Doing It Yourself
Installing a butcher block countertop is more than a weekend project – it’s a creative investment in your home. It demands focus, but it also delivers immense pride. You’ll save on labor, yes, but more importantly, you’ll experience the satisfaction of working with natural wood and seeing it respond beautifully to your care.
If you’re ready to take the next step, Butcher Block Co. offers countertops in up to 15 wood species, from Hard Rock Maple and American Black Walnut to Cherry, Oak, and other premium hardwoods. With custom sizing, grain styles, and finish options, there’s a perfect top for every kitchen style and skill level. Explore the possibilities and start planning the countertop that brings warmth and character to your kitchen space.